Today, because I've been asked quite a bit to do so, let's talk about our camp shower. Well, maybe I'll show you a bunch of pictures and talk just a little. I don't know why my eyes start to glaze over when writing technical how-to type stuff, but they do. However, I want to share it with you because the system we came up with is ridiculously simple and quite honestly, everyone should have one. If you've ever lived through an extended power outage (without a generator), you'll probably agree. You could use this system outside or right inside your existing shower, allowing the water to drain away.
Let's jump to the photos and I'll narrate along the way…
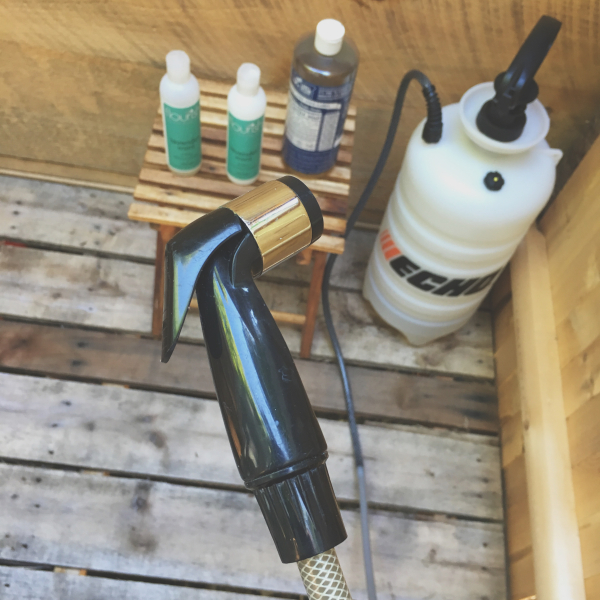
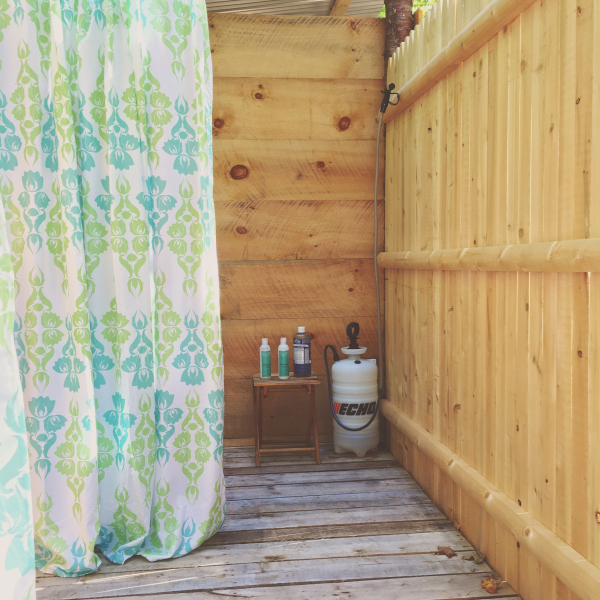
That's about it right there. Fancy, eh? We purchased one of those pressurized lawn applicator pesticide devices (buy it new for obvious reasons) and Adam rigged up a longer hose, as well as a sprayer just like you'd have at the kitchen sink. The sprayer this tank came with produced a very fine mist, rendering soap rinsing an impossible task. This one does a much better job. In fact, it's better than some indoor showers I've had in my life.
The tank holds three gallons, but we never use that much water. Basically, I'll put a gallon or so of room temperature water from the rain barrel in there, then heat a pan of water to boiling over the fire or camp stove. Once boiled, add it to the tank and you've got a perfect hot shower. There is always a water left in the tank at the end, which we just leave for the next shower, topping it off with boiling water to repeat the process. Easy as can be.
Maybe we should pan out and see where we house this thing.
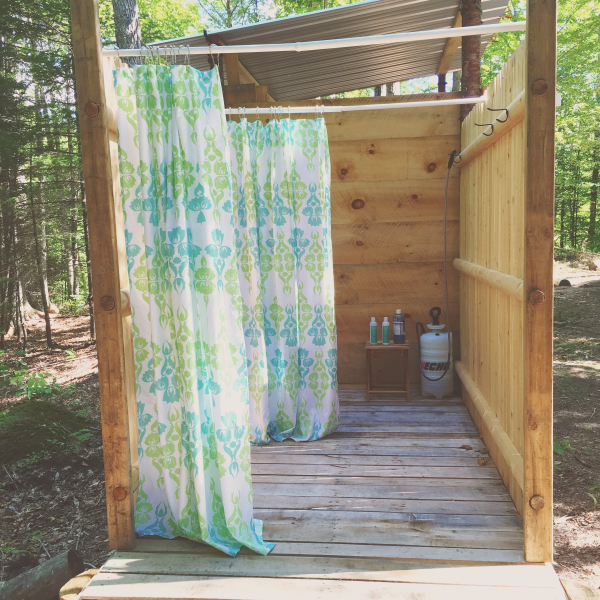
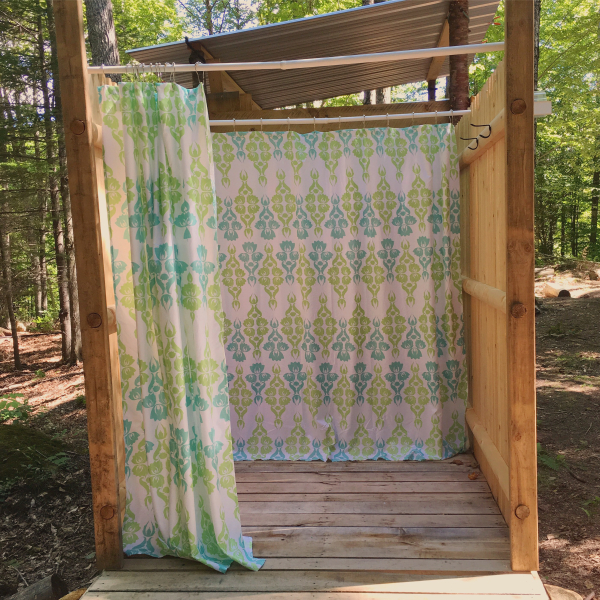
The floor is made up of free pallets, Adam has an eye for the type that aren't pressure treated. I asked him how he can tell and he said is has to do with coloring, but also sometimes there are specific stamps/markings to look for. The pallets he used are not square, but rectangular. I think there are three lined up in there. They are about four feet wide a piece, which makes for a plenty wide shower. And in case it's not obvious, the grey water drains away through the slots in the floor. The plan was to create a a wet area for bathing, and a dry area for dressing. You think about these things when you have an eighteen year old daughter who is mostly tolerant of her parents' backwoods shenanigans but also appreciates a little privacy. We pulled off the divided space with regular shower tension rods and curtains (which I need to hem). It works great. By the way, our shower here at home is one of those dreadful 30 inch numbers, so this thing feels downright palatial.
The two sides are a couple of 8 ft long privacy panels, 6 ft high. Adam attached them to the back wall (which is a structure in the making to tell about another day), the pallet floor, and the two posts in the front. I have no idea how he notched out the holes that you see the fence slipped into; with no power up here, tool use is limited. Somehow he did, though.
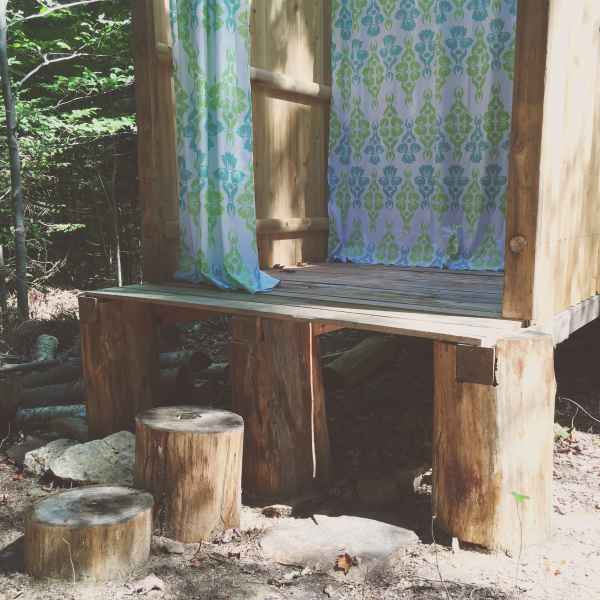
I do know he used the chainsaw to notch out those logs for the pallets to rest into. Nice and stable. And steps were added after he built the whole thing and I reminded him that not everyone is over six feet tall. Turns out the shower is about two feet off the ground, which felt like a single step up to him. To me, not so much.
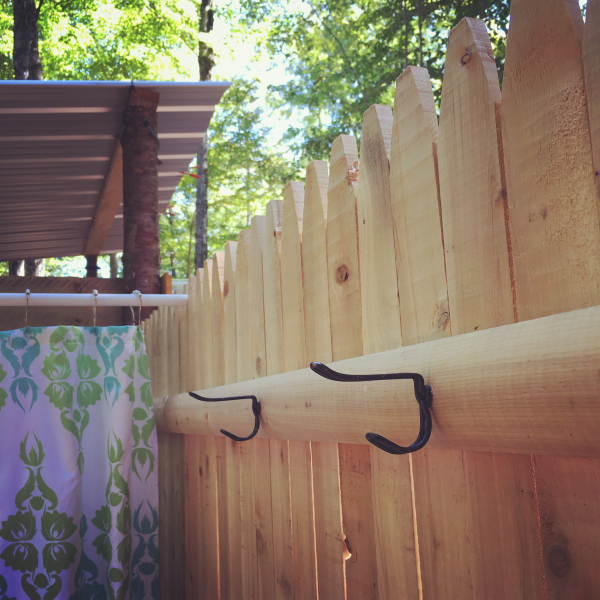
We added a bunch of hooks that were brought from our old house, they were handmade in the 1920s and we have dozens of them. We did leave the hand-carved chestnut front door and glass cut door knobs throughout, so I don't feel too badly about removing some hooks from the closets. And I kind of like knowing we have this piece of our first home with us still, and forever.
No roof yet, maybe we should have one. It would definitely protect the wood longer. But this structure is actually temporary so we'll hold off on that for now. (I know, check back in five years and we'll probably still be using this, as is.)
That's about it. I hope this provides a good visual to those of you who were interested. And of course if you have any questions, feel free to ask.

